
Skyblock
In this gamemode, your island is the center of your gameplay and your main focus. Upgrade your tools, build your farms, mine your blocks, make your shops, and progress. Compete against others on /is top, opt out by going casual, the sky is the limit!
Apart from this Wiki we have a small help menu with our general features in-game which you start with this in your inventory on your 9th slot. You can right click and remove the item in /toggle or manually check through /menu.
How To Start
When you first spawn in, you’ll want to do /is create <name> and claim your first /kit. Once you create an island, you may opt in (comp/harder) or opt out of Island Top (casual/easier). On your island is where you will build your farms, spawners, and player shops. You’ll have the choice between a Void Island and a Floating Island, which starts you with a basic island. After creating your island, the possibilities are limitless. You can build the greatest farms, and grinders as you unlock new mobs. Once you have ventured out from your island you will need to use the command /is go to return!
Island Information
Like our other gamemodes, Skyblock too has its own weekly competition and payouts. When creating an island you may either create a Casual Island or Comp Island. Casual being easier for Island Checkpoints scaling 25% per additional member however not being able to purchase trophies towards /is top & Comp scaling at 50% and able to win weekly winner payout. To gain trophies your main goal will be to gain as much Money as possible in as each Trophy costs 100m Money.


Island Checkpoints
Grind through Farming, Mining, and Slaying quests to unlock the requirement for higher island levels. For each additional island member you invite to your team the milestones will increase. For Casual Islands it will be 25% per member whereas Comp Islands will scale by 50% of the base value.
For example Farming Checkpoint [1] requires a base 100,000 wheat farmed.
With 3 members on a Casual Team this will become 150,000 (+50% for 2 additional Island Members).
With 6 members of a Comp team this becomes 350,000 (+250% for 5 additional Island Members).
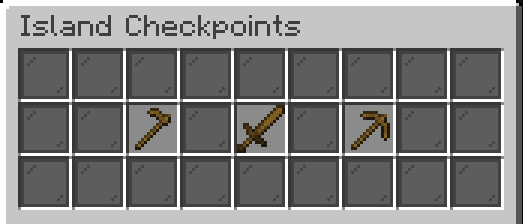
Farming Checkpoints
- Farming Checkpoint [1]
Farm 100,000 Wheat - Farming Checkpoint [2]
Farm 125,000 Wheat
Farm 125,000 Potato - Farming Checkpoint [3]
Farm 150,000 Wheat
Farm 150,000 Potato
Farm 150,000 Carrot - Farming Checkpoint [4]
Farm 175,000 Wheat
Farm 175,000 Potato
Farm 175,000 Carrot
Farm 175,000 Beetroot - Farming Checkpoint [5]
Farm 200,000 Wheat
Farm 200,000 Potato
Farm 200,000 Carrot
Farm 200,000 Beetroot
Farm 200,000 Nether Wart - Farming Checkpoint [6]
Farm 250,000 Wheat
Farm 250,000 Potato
Farm 250,000 Carrot
Farm 250,000 Beetroot
Farm 250,000 Nether Wart
Mining Checkpoints
- Mining Checkpoint [1]
Mine 25,000 Coal Ore - Mining Checkpoint [2]
Mine 75,000 Coal Ore
Mine 40,000 Iron Ore - Mining Checkpoint [3]
Mine 125,000 Coal Ore
Mine 75,000 Iron Ore
Mine 25,000 Gold Ore
Mine 15,000 Redstone Ore - Mining Checkpoint [4]
Mine 175,000 Coal Ore
Mine 125,000 Iron Ore
Mine 50,000 Gold Ore
Mine 30,000 Redstone Ore
Mine 10,000 Diamond Ore - Mining Checkpoint [5]
Mine 200,000 Coal Ore
Mine 200,000 Iron Ore
Mine 100,000 Gold Ore
Mine 60,000 Redstone Ore
Mine 25,000 Diamond Ore
Mine 15,000 Emerald Ore - Mining Checkpoint [6]
Mine 225,000 Coal Ore
Mine 225,000 Iron Ore
Mine 125,000 Gold Ore
Mine 90,000 Redstone Ore
Mine 60,000 Diamond Ore
Mine 30,000 Emerald Ore - Mining Checkpoint [7]
Mine 200,000 Nether Rack
Mine 50,000 Nether Quartz Ore - Mining Checkpoint [8]
Mine 175,000 Nether Rack
Mine 75,000 Nether Quartz Ore
Mine 10,000 Nether Gold Ore - Mining Checkpoint [9]
Mine 150,000 Nether Rack
Mine 100,000 Nether Quartz Ore
Mine 50,000 Nether Gold Ore
Mine 10,000 Nether Bricks - Mining Checkpoint [10]
Mine 150,000 Nether Rack
Mine 150,000 Nether Quartz Ore
Mine 50,000 Nether Gold Ore
Mine 15,000 Nether Bricks
Mine 10,000 Magma Block - Mining Checkpoint [11]
Mine 100,000 Nether Rack
Mine 150,000 Nether Quartz Ore
Mine 100,000 Nether Gold Ore
Mine 25,000 Nether Bricks
Mine 15,000 Magma Block
Mine 10,000 Basalt - Mining Checkpoint [12]
Mine 125,00 Nether Quartz Ore
Mine 150,00 Nether Gold Ore
Mine 40,000 Nether Bricks
Mine 25,000 Magma Block
Mine 15,000 Basalt
Mine 5,000 Ancient Debris - Mining Checkpoint [13]
Mine 100,000 Nether Quartz Ore
Mine 125,000 Nether Gold Ore
Mine 75,000 Nether Bricks
Mine 40,000 Magma Block
Mine 25,000 Basalt
Mine 10,000 Ancient Debris
Slaying Checkpoint
- Slaying Checkpoint [1]
Slay 20,000 Sheep
Slay 20,000 Snowman
Slay 20,000 Polar Bear - Slaying Checkpoint [2]
Slay 30,000 Polar Bear
Slay 30,000 Zombie
Slay 30,000 Skeleton
Slay 30,000 Creeper - Slaying Checkpoint [3]
Slay 40,000 Zombie
Slay 40,000 Skeleton
Slay 40,000 Creeper
Slay 40,000 Spider
Slay 40,000 Wolf - Slaying Checkpoint [4]
Slay 50,000 Skeleton
Slay 50,000 Creeper
Slay 50,000 Spider
Slay 50,000 Wolf
Slay 50,000 Villager - Slaying Checkpoint [5]
Slay 75,000 Villager
Slay 75,000 Magma Cube
Slay 75,000 Ravager
Slay 75,000 Strider
Slay 75,000 Drowned - Slaying Checkpoint [6]
Slay 100,000 Magma Cube
Slay 100,000 Ravager
Slay 100,000 Strider
Slay 100,000 Drowned
Slay 100,000 Stray
Island Levels
In order to unlock higher Levels you will have to meet certain requirements through completing Island Milestones. Once the Island Milestone requirement is met you're able to purchase new levels with Money unlocking more Island Upgrades.

Requirements
- Island Level [1]
N/A (Free) - Island Level [2]
Farming Checkpoint [1]
100m Money - Island Level [3]
Slaying Checkpoint [1]
250m Money - Island Level [4]
Mining Checkpoint [1]
500m Money - Island Level [5]
Farming Checkpoint [2]
1B Money - Island Level [6]
Slaying Checkpoint [2]
5B Money - Island Level [7]
Mining Checkpoint [2]
10B Money - Island Level [8]
Farming Checkpoint [3]
25B Money - Island Level [9]
Slaying Checkpoint [3]
50B Money - Island Level [10]
Mining Checkpoint [3]
100B Money - Island Level [11]
Farming Checkpoint [4]
250B Money - Island Level [12]
Slaying Checkpoint [4]
500B Money - Island Level [13]
Mining Milestone [4]
750B Money - Island Level [14]
Farming Checkpoint [5]
1T Money - Island Level [15]
Slaying Checkpoint [5]
5T Money - Island Level [16]
Mining Checkpoint [5]
7,5T Money - Island Level [17]
Farming Checkpoint [6]
10T Money - Island Level [18]
Slaying Checkpoint [6]
25T Money - Island Level [19]
Mining Checkpoint [6]
30T Money - Island Level [20]
Mining Checkpoint [7]
40T Money - Island Level [21]
Mining Checkpoint [8]
50T Money - Island Level [22]
Mining Checkpoint [9]
60T Money - Island Level [23]
Mining Checkpoint [10]
70T Money - Island Level [24]
Mining Checkpoint [11]
80T Money - Island Level [25]
Mining Checkpoint [12]
90T Money - Island Level [26]
Mining Checkpoint [13]
100T Money
Unlockable Upgrades
- Island Level [1]
N/A - Island Level [2]
Generator Pad Block Limit [1]
Generator Pad Blocks [1]
Spawner Stack Size [1]
Border Size [1]
Generator Pad Respawn Time [1]
Collector Storage [1] - Island Level [3]
Collector Range [1]
EXP Boost [1]
Robot Speed [1]
Collector Slots [1] - Island Level [4]
Robot Limit [1]
Crops [1]
Collector Storage [2]
Collector Slots [2]
Spawner Stack Size [2] - Island Level [5]
Generator Pad Block Limit [2]
Generator Pad Blocks [2]
Border Size [2]
Generator Pad Respawn Time [2]
Collector Slots [3] - Island Level [6]
EXP Boost [2]
Collector Range [2]
Collector Storage [3]
Collector Slots [4]
Spawner Stack Size [3]
Enchanted Magma Cube Spawner - Island Level [7]
Robot Limit [2]
Generator Pad Block Limit [3]
Crops [3]
Robot Speed [2]
Collector Slots [5] - Island Level [8]
Generator Pad Block Limit [4]
Generator Pad Block [3]
Border Size [3]
Generator Pad Respawn Time [3]
Spawner Stack Size [4]
Enchanted Strider Spawner - Island Level [9]
Collector Range [3]
EXP Boost [3]
Collector Slots [6] - Island Level [10]
Robot Limit [3]
Generator Pad Block Limit [5]
Crops [3]
Robot Speed [3]
Collector Storage [5]
Spawner Stack Size [5]
Enchanted Ravager Spawner - Island Level [11]
Generator Pad Block [4]
Border Size [4]
Collector Slots [7] - Island Level [12]
Collector Range [4]
EXP Boost [4]
Generator Pad Respawn Time [4]
Collector Slots [8] - Island Level [13]
Robot Limit [4]
Generator Pad Block Limit [6]
Crops [4]
Collector Storage [6]
Collector Slots [9]
Spawner Stack Size [6]
Enchanted Drowned Spawner - Island Level [14]
Generator Pad Block [5]
Border Size [5]
Robot Speed [4]
Collector Range [5]
Collector Slots [10] - Island Level [15]
EXP Boost [5]
Generator Pad Block Limit [7]
Collector Slots [11]
Spawner Stack Size [8] - Island Level [16]
Robot Limit [5]
Upgrade Pad Block Limit [8]
Generator Pad Respawn Time [5]
Collector Storage [7]
Collector Slots [12]
Enchanted Stray Spawner - Island Level [17]
Generator Pad Block Limit [9]
Generator Pad Block [6]
Border Size [6]
Collector Slots [13] - Island Level [18]
EXP Boost [6]
Robot Speed [5]
Collector Range [6]
Collector Storage [6]
Collector Slots [6]
Spawner Stack Size [8] - Island Level [19]
Robot Limit [6]
Generator Pad Block Limit [10]
Generator Pad Respawn Time [6]
Nether Island
Collector Slots [15]
Enchanted Evoker Spawner - Island Level [20]
Nether Generator Pad Block [1]
Spawner Stack Size [9]
Enchanted Wither Skeleton Spawner - Island Level [21]
Nether Generator Pad Block [2]
Collector Slots [16] - Island Level [22]
Collector Range [7]
Nether Generator Pad Block [3]
Spawner Stack Size [10] - Island Level [23]
Nether Generator Pad Block [4]
Collector Storage [9]
Collector Slots [17]
Enchanted Blaze Spawner - Island Level [24]
Nether Generator Pad Block [5]
Spawner Stack Size [11] - Island Level [25]
Nether Generator Pad Block [6]
Collector Slots [18] - Island Level [26]
Collector Storage [10]
Spawner Stack Size [12]
Enchanted Zombified Piglin Spawner
Island Upgrades
Once you've reached a new Island Level you will have unlocked new upgrades for you to purchase and give you additional buffs for you and your entire island.

*Some of the upgrades may be missing or no longer accurate*
Island Upgrades
- Spawner Stack Size
[0] 50 Spawners (Free)
[1] +50 Spawners (Island Level 2 | 100m)
[2] +100 Spawners (Island Level 4 | 250m)
[3] +100 Spawners (Island Level 6 | 500m)
[4] +100 Spawners (Island Level 8 | 1b)
[5] +100 Spawners (Island Level 10 | 10b)
[6] +100 Spawners (Island Level 11 | 25b)
[7] +100 Spawners (Island Level 14 | 100b)
[8] +100 Spawners (Island Level 15 | 1t)
[9] +100 Spawners (Island Level 17 | 10t)
[10] +100 Spawners (Island Level 19 | 100t) - Robot Limit
[0] 1 Robot (Free)
[1] +1 Robot (Island Level 4 | 250m)
[2] +1 Robot (Island Level 7 | 1b)
[3] +1 Robot (Island Level 10 | 10b)
[4] +1 Robot (Island Level 13 | 500b)
[5] +1 Robot (Island Level 16 | 5t)
[6] +1 Robot (Island Level 19 | 50t) - Collector Slots
[0] 3 Collector (Free)
[1] +1 Slot (Island Level 3 | 100m)
[2] +1 Slot (Island Level 4 | 500m)
[3] +1 Slot (Island Level 5 | 5b)
[4] +1 Slot (Island Level 6 | 25b)
[5] +1 Slot (Island Level 7 | 50b)
[6] +1 Slot (Island Level 9 | 75b)
[7] +1 Slot (Island Level 11 | 100b)
[8] +1 Slot (Island Level 12 | 250b)
[9] +1 Slot (Island Level 13 | 500b)
[10] +1 Slot (Island Level 14 | 750b)
[11] +1 Slot (Island Level 15 | 1t)
[12] +1 Slot (Island Level 16 | 2,5t)
[13] +1 Slot (Island Level 17 | 5t)
[14] +1 Slot (Island Level 18 | 7,5t)
[15] +1 Slot (Island Level 19 | 10t)
[16] +1 Slot (Island Level 21 | 15t)
[17] +1 Slot (Island Level 23 | 20t)
[18] +1 Slot (Island Level 25 | 25t) - Ore Blocks
[0] Coal Ore* (Free)
[1] +Iron Ore* (Island Level 2 | 100m)
[2] +Gold Ore* (Island Level 5 | 500m)
[3] +Redstone & Lapis Ore* (Island Level 8 | 5b)
[4] +Diamond Ore* (Island Level 11 | 50b)
[5] +Emerald Ore* (Island Level 14 | 5t)
[6] * (Island Level 17 | 50t)
*More Information on exact ore chances further down under "Generator Pads". - Generator Pad Limit
[0] 250 (Free)
[1] +50 (Island Level 2 | 100m)
[2] +50 (Island Level 5 | 250m)
[3] +50 (Island Level 7 | 500m)
[4] +100 (Island Level 8 | 1b)
[5] +50 (Island Level 10 | 10b)
[6] +50 (Island Level 13 | 25b)
[7] +100 (Island Level 15 | 100b)
[8] +100 (Island Level 16 | 1t)
[9] +100 (Island Level 17 | 10t)
[10] +100 (Island Level 19 | 100t) - Experience Boost
[0] 0.0x (Free)
[1] +0,1x (Island Level 3 | 100m)
[2] +0.1x (Island Level 6 | 500m)
[3] +0.1x (Island Level 9 | 5b)
[4] +0.1x (Island Level 12 | 50b)
[5] +0.1x (Island Level 15 | 5t)
[6] +0.25x (Island Level 18 | 50t) - Island Crops
[0] Wheat (Free)
[1] +Potato (Island Level 4 | 500m)
[2] +Carrot (Island Level | 5b)
[3] +Beetroot (Island Level | 50b)
[4] +Nether Wart (Island Level | 5t) - Border Size
[0] 50 (Free)
[1] +10 (Island Level 2 | 100m)
[2] +15 (Island Level 5 | 500m)
[3] +10 (Island Level 8 | 5b)
[4] +15 (Island Level 11 | 50b)
[5] +10 (Island Level 14 | 5t)
[6] +15 (Island Level 17 | 50t) - Enchanted Spawner Vesion
Magma Cube Spawner (Island Level 6)
Strider Spawner (Island Level 8)
Ravager Spawner (Island Level 10)
Drowned Spawner (Island Level 13)
Stray Spawner (Island Level 16)
Evoker Spawner (Island Level 19)
Generator Pads
Instead of your normal cobblestone generators we have something unique called "Generator Pads" that will generate cobblestone and ores. The higher your Island Upgrade, the better the ores available. To view the exact chance see "Generator Pad Ore Chances" below.
In order to obtain Generator Pads you can claim a /kit or drop them from Snowy/Mesa dungeons keys found in /keys.

Once you place down a Generator Pad you may pick it back up by shift-right clicking. Each Pad will go generate 11 blocks outwards towards the direction you've placed the Pad on. For example if you've placed your Pad on the top of a block it will generate 11 randomized blocks going up.
Generator Pad Ore Chances
- 0 Upgrades
Cobblestone 80%
Coal 20% - 1 Upgrade
Cobblestone 70%
Coal Ore 25%
Iron Ore 5% - 2 Upgrades
Cobblestone 50%
Coal Ore 30%
Iron Ore 15%
Gold Ore 5% - 3 Upgrades
Cobblestone 35%
Coal Ore 32,5%
Iron Ore 17,5%
Gold Ore 7,5%
Redstone Ore 5%
Lapis Ore 2,5% - 4 Upgrades
Cobblestone 22,5%
Coal Ore 35%
Iron Ore 25%
Gold Ore 10%
Redstone Ore 7,5%
Lapis Ore 5%
Diamond Ore 2,5% - 5 Upgrades
Coal Ore 30%
Iron Ore 30%
Gold Ore 15%
Redstone Ore 10%
Lapis Ore 7,5%
Diamond Ore 5,0%
Emerald Ore 2,5% - 6 Upgrades
Coal Ore 22,5%
Iron Ore 20%
Gold Ore 20%
Redstone Ore 15%
Lapis Ore 10%
Diamond Ore 7,5%
Emerald Ore 5%
Nether Generator Pad Chances
- 0 Upgrades
Nether Rack: 80%
Nether Quartz Ore: 20% - 1 Upgrade
Nether Rack: 60%
Nether Quartz Ore: 35%
Nether Gold Ore: 5% - 2 Upgrades
Nether Rack: 50%
Nether Quartz Ore: 30%
Nether Gold Ore: 15%
Nether Bricks: 5% - 3 Upgrades
Nether Rack: 35%
Nether Quartz Ore: 35%
Nether Gold Ore: 17.5%
Nether Bricks: 7.5%
Magma Block: 5% - 4 Upgrades
Nether Rack: 25%
Nether Quartz Ore: 35%
Nether Gold Ore: 22.5%
Nether Bricks: 10%
Magma Block: 7.5%
Basalt: 5% - 5 Upgrades
Nether Quartz Ore: 30%
Nether Gold Ore: 35%
Nether Bricks: 15%
Magma Block: 10%
Basalt: 7.5%
Ancient Debris: 2.5% - 6 Upgrades
Nether Quartz Ore: 20%
Nether Gold Ore: 30%
Nether Bricks: 20%
Magma Block: 15%
Basalt: 10%
Ancient Debris: 5%
Enchanter
Books from the Enchanter are obtained by grinding Experience from Slaying Island Mobs, there are also Enchantments for mining/farming that have a chance to give you Enchanter Books. Each book purchased will be added into your /books menu.
There are a variety of unique Enchants you can apply to your Sword/Pickaxe/Hoe each helping you in different ways. To view all enchantments and what they do head into the /enchanter menu, click on a rarity, then press "Enchant Index".
In order to apply an Enchant to your item simply head to /books, withdraw the book of choice, and drag & drop it onto your tool. As each enchantment book comes with a different apply chance we recommend using the Tinker Mode in the books menu to obtain dust. With Dust you may improve the apply chance of any book by dropping onto the enchantment book you with to improve.
Dungeons
Skyblock dungeons are an essential feature and a core part of this realm. This is the only place you’re able to obtain Shards. When typing /dungeons, you will be greeted by a menu displaying various different tiers of dungeons which become accessible to you as your personal player level progresses.
Dungeon NPCs and Crafting
Inside dungeons you will be faced with a very large number of highly aggressive NPCs with varying levels of health and damage depending on their tier of dungeon you are in. These dungeon NPCs are defeated using any sword, to claim your first sword and armor set claim your /kit.
Defeating NPCs inside the dungeon will give you a chance to receive two types of rewards.
Dungeons drops
Each NPC you defeat will give you a chance to receive a dungeon drop that can be used to craft highly desired items such as totem boxes, monthly crates, pet traits and stats, totem slots, cosmetics, credits, and much much more.
To see what is required to craft these items, and to see how many dungeon drops you have, you can access your dungeon backpack by right clicking the chest in your hotbar or through the /backpack (/bp) command.
In addition to the dungeon drops that you can receive as rewards, you’re also able to obtain various other rewards from defeating these NPCs such as keys (higher tier keys for higher tier dungeons), Golden apples, Pet boxes, Crystal boxes, shards, and more.
Leaderboards & Payouts
As you continue to play Skyblock you may be able to win Credits through /leaderboard or weekly winners!
Leaderboards
/leadeboard is an individual competitive aspect which uses a point system in a bunch of different aspect of the game to win. This ranges from Voting to Crops Harvested and much more. Each category can give you up to 9 points towards the Points Leaderboard and at the end of the week the player with the most points across the board will win Credits.
Island Top
If you're in a Comp Island you may purchase Trophies in an attempt to win Is Top Weekly Winners Payout. Work with your team to collect money throughout the week and purchase Trophies at 100m Money per in the /is top menu. Winners will be calculated on Saturday at 3pm EST.
After the week is completed and your team has managed to win the Island Leader must create a ticket in our discord to claim the payout reward.
For Individual payouts like Crop Top and Level Top the winner themselves must create a ticket to claim the prize.
You and/or the Island Leader will only have 1 week to claim the credit payout.
Payout Amount
- Points Leaderboard (Weekly)
1st Place: 5,000 Credits
2nd Place: 4,500 Credits
3rd Place: 4,000 Credits
4th Place: 3,500 Credits
5th Place: 3,000 Credits
6th Place: 2,500 Credits
7th Place: 2,000 Credits
8th Place: 1,500 Credits
9th Place: 1,000 Credits
10th Place: 500 Credits - Island Top (Weekly)
1st Place: 10,000 Credits
2nd Place: 8,000 Credits
3rd Place: 5,000 Credits
4th Place: 2,000 Credits
5th Place: 1,000 Credits - Level Top (Weekly)
1st Place: 2,500 Credits
2nd Place: 1,000 Credits
3rd Place: 500 Credits
Pets & Totems
Players will be able to buff their individual stats and /boost through obtaining various Pets and Totems. Each Pet and Totem gives you a unique boost based on which type you have. In some cases you may have to prioritize one pet over another to ensure you gain the highest damage boost for going into the Dungeons.
Pets
In order to obtain Pets you'll have to gain Pet Boxes from keys. Keys are easily obtained in Dungeons or through the use of enchantments.
New pets get added almost every Update so make sure to keep an eye out in our Discord for the new drops!
Pet Stats & Traits
With the use of a Pet Stat Dice your Pet will randomly get a grade for each ability. There are 3 Pet Abilities that will be graded individually going from a C- giving minus 5% to 2,5% buff to SSS which may increase your pets ability upwards to 25%!
You are able to obtain "Special Pet Stat Dice" which allow you to individually roll one of the 3 Pet Abilities and keep the other 2 the same, this especially comes in handy when you get 2 S stats and another low one.

Through the use of Pet Traits you can increase either the Experience Gained, Level Cap, Buff Multiplier, all of those combined with "God" trait, or obtain Twin Trait which has a small chance to temporarily buff your pet by 2x.
Totems
Totems which are mainly obtained through Dungeons Slaying mobs in a PVE world. You may merge totems by combining 3 of the same type / level making the level or in some cases star go up by one.
Each Totem can have one of our 14 skins applied to them buffing the totem stats or gaining additional boosts.
Player Warps
Have you created a player shop and wish to have players warp you your island?
Use /pw create <name> at the location you wish for other users to be sent and then type [warp] in chat to advertise your player warp. To manually visit player shops you may use /pw visit <user> and get teleported to their pw if applicable.
Every day you're able to bid on advertising slots with credits through /pw bid <amount>. This can be useful to get extra players visit your island and shops when you are afk and unable to advertise.

Updates
Throughout the season various updates will drop with new content being added. To keep track and up to date with new features and realm resets we highly recommend you join our discord: discord.gg/enchantedmc
If you have any questions unanswered please do not hesitate to create a ticket in our Discord Server.